
Before diving into how we can prevent a DMA attack, it’s important to first understand just how simple this process can be for someone with the right tools and know-how.
‘Direct Memory Access’ is a mechanism that allows a computer peripheral – such as an external device or internal add-in card – to access system memory without requiring the CPU’s involvement for every data transfer. This is used to optimise data transfers and free up the CPU to perform other necessary tasks.
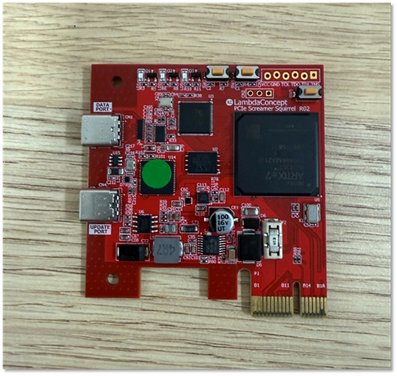
DMA attacks are an attack vector that is based on this mechanism, where a threat actor uses a specialised device that has direct access to a computer’s memory, bypassing security controls to extract data or inject malicious code. The ‘PCIe Screamer Squirrel’ created by ‘LambdaConcept’ – used within the game hacking community to bypass cheat detection software – is one example of a hardware device capable of performing these attacks.
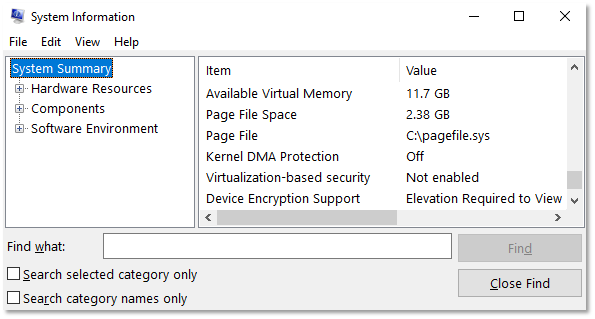
One feature in Windows that helps prevent DMA attacks is ‘Kernel DMA Protection’, shown here as set to ‘Off’ within the ‘System Information’ panel.
Despite enabling many of the common DMA protection recommendations, this setting may not be correctly set due to other factors such as older hardware limitations or other BIOS settings that remain unadjusted. In order to have ‘Kernel DMA Protection’ set to ‘On’, the following requirements must be met:
Use a UEFI BIOS
Note that this may be a physical limitation that older devices do not support. However, most modern devices should support a UEFI BIOS.
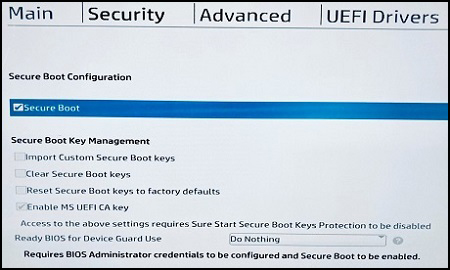
Enable Secure Boot
The exact steps for this vary between device vendors, but typically the steps are similar to:
- Boot into the device UEFI/BIOS settings
- Navigate to the “Boot” or “Security” section
- Enable “Secure Boot” option
- Save changes and exit
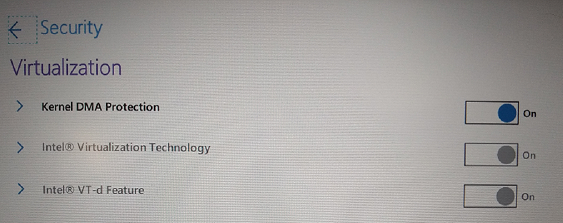
Enable Virtualisation/IOMMU (VT-d or AMD-Vi).
The exact steps for this vary between device vendors, but typically the steps are similar to:
- Boot into the device UEFI/BIOS settings
- Navigate to “Advanced” > “CPU Configuration” or similar
- Enable “Intel Virtualization Technology for Directed I/O” (VT-d) or “AMD-Vi”
- Save changes and exit
Enable Additional Virtualisation-Based Security
These following steps can be applied as a ‘Group Policy’ in Windows:
- Open Group Policy Editor
- Navigate to “Computer Configuration” > “Administrative Templates” > “System” > “Device Guard”
- Find and enable “Turn On Virtualization Based Security”
- Set “Select Platform Security Level” to “Secure Boot and DMA Protection”
- Click “Apply” and “OK”
- Restart
With ‘Kernel DMA Protection’ enabled, DMA attempts will result in the operating system freezing or crashing before compromise can occur. This is illustrated by the following photo where a DMA attack failed on a laptop with ‘Kernel DMA Protection’ set to ‘On’. (Note the ‘DRIVER_VERIFIER_DMA_VIOLATION’ BSOD stop code shown in the picture.)

For more information on ‘Kernal DMA Protection’, see the following resource: